


Git is the most popular and efficient version control system today. It helps us track and manage changes in our files, in a distributed fashion. Learning git is one of the most essential skills a software engineer can have. Running into terrifying git error messages and trying to resolve them is the kind of git learning experience one needs to truly master git.
Working together as a team on the same git repository is a challenging task, with different members often working on the same feature. To avoid conflicts, git has a branch feature, which is the hallmark of git and why it was made in the first place. Git allows us to create multiple branches for the same repository so different people can work on it and later upon finishing their changes, they can merge their branch to the main branch of the repository. In this blog, we will go over how to create git branches, switch between them and effectively manage them.
- First, lets create an empty Github repository, which will be our remote repository. It will allow us to push our local code to this remote repository and view our different branches. Login to Github. On the top right section of the page, click on the '+' icon, which will allows us to create a repository
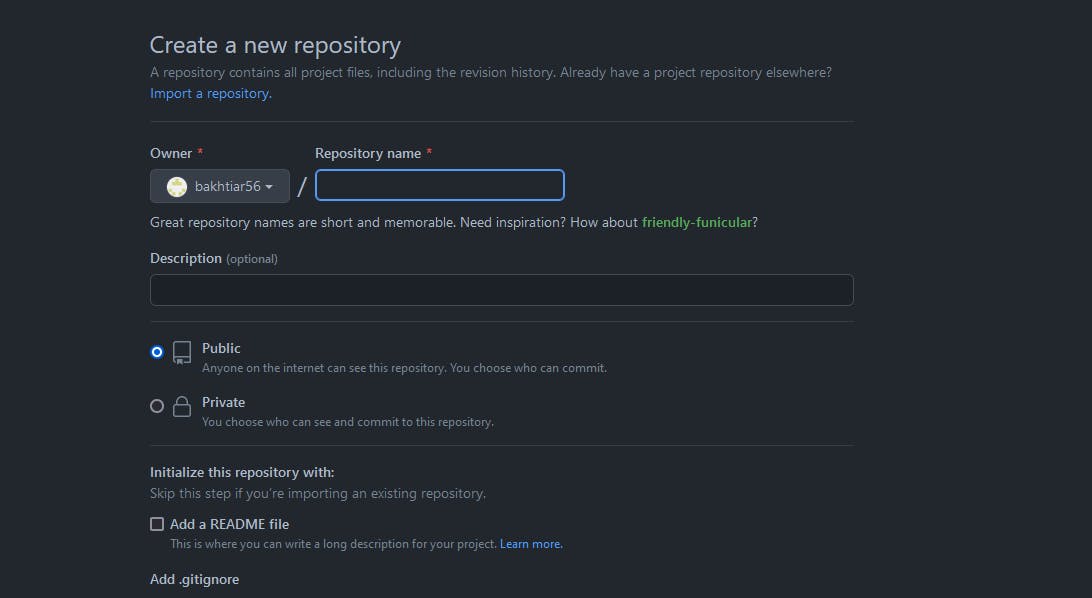
- Enter the name of your repository then scroll down and click on Create Repository Button.
- After your repository loads, it will look something like this.
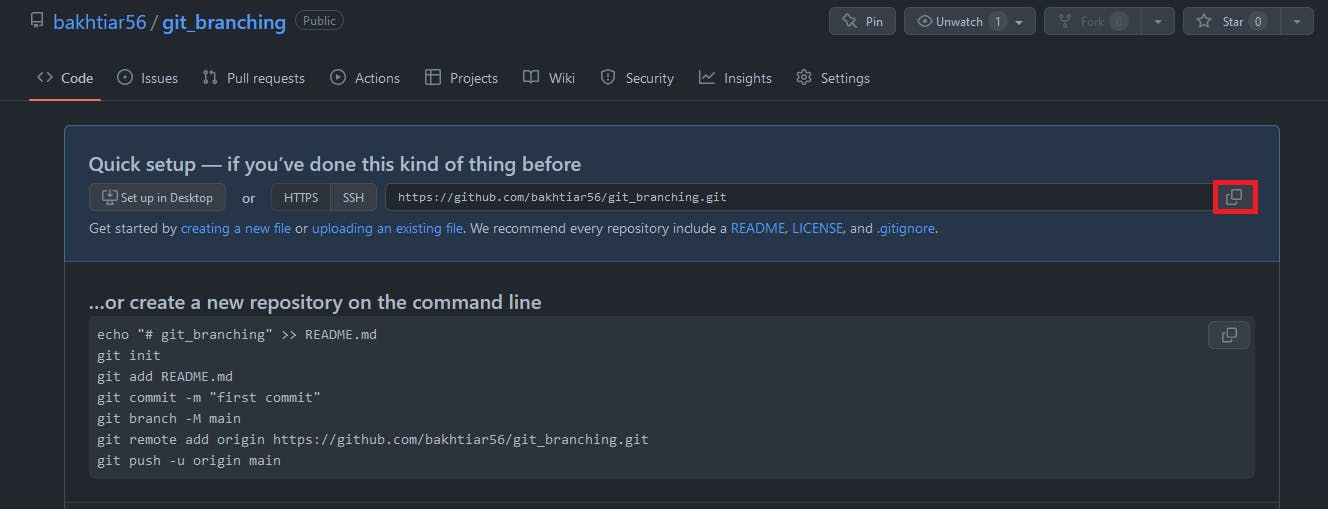 We need to copy the repository URL which we will use to connect our local git repository to github repository. To do that, click on the copy icon, highlighted in red outline.
 - Open your terminal such as CMD or Powershell for Windows users and zsh/iterm for Mac Users. Make sure you have git installed. If not, install Git.
Enter the command
git clone your_repo_urlwhere after the clone word, you paste your copied repository URL from previous step.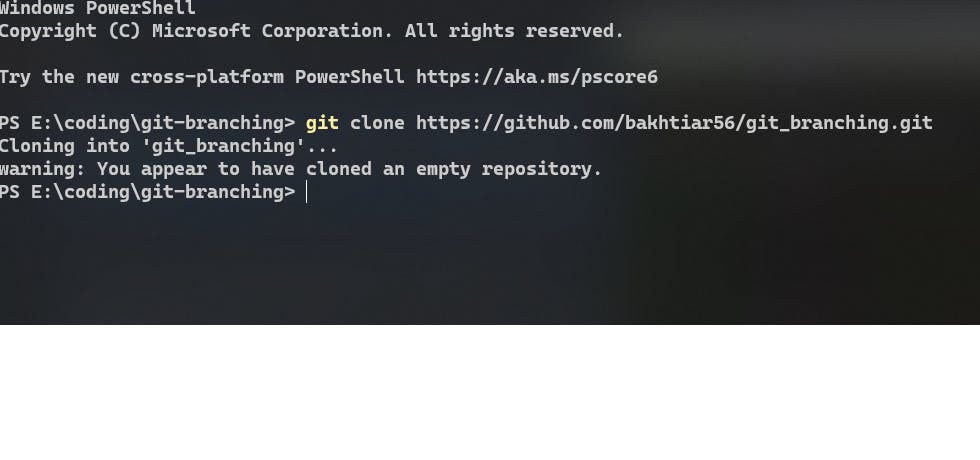
- This will clone the remote repository from github onto your local computer. Now change your directory into the new repository folder. By typing
cd your_repo_nameIf you are using git_bash or UNIX terminal, it will indicate that you have entered a git repository by showing main at the end of the current directory path. .
. In order to create new branch, we first need to commit something because repository is still empty.
So we create a file named 'test.txt' by typing
touch test.txt.- Then we add it to our git staging area by typing
git add . - Next, we commit our code to the local repository by typing
git commit -m "created first commit" - Now, we will also push our code to the remote repo by typing
git push origin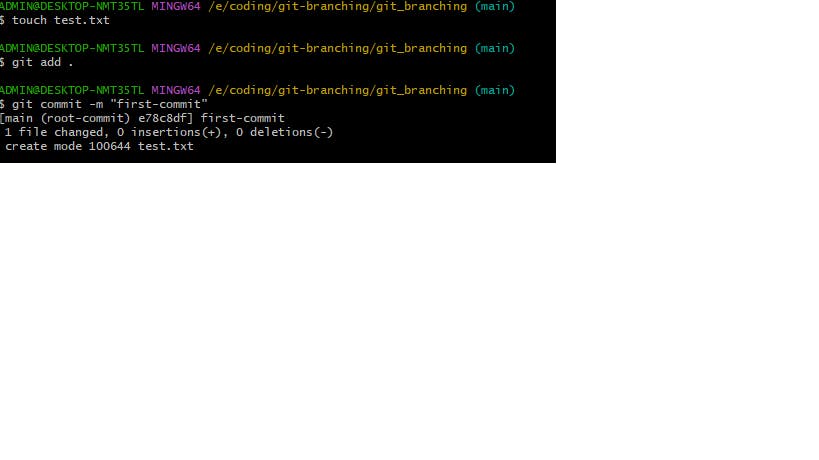
- Next, to create a git branch, we type
git branch new_branch, where after the branch word, we add the name of our new branch. After, this we see the names of our two current branches by typinggit branchMainly main and new_branch.
- We can also create a new branch from a specific revision of the commit history by using the commit hash. We can type
git branch new_branch specific_commit_hashWe can get the commit hash of our specific commits by going to github repository and copying the commit hash on the top of repository window.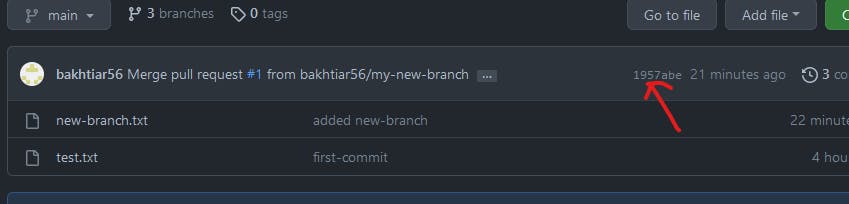 We can then copy the commit hash consisting of alphanumeric characters of a specific commit and create a branch from that revision.
 We then switch to our newly created branch by entering the syntax
git checkout new_branchWe can also create a branch and switch to that branch in one command by typinggit checkout -b new_branchWe can also switch to a new branch by typinggit switch new_branchTo view our branch name, we type
git status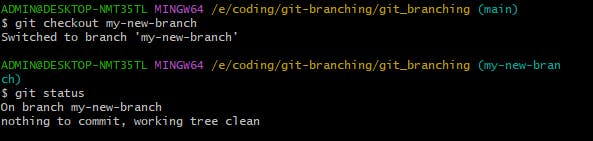
- We can also rename our HEAD branch by typing
git branch -m new_name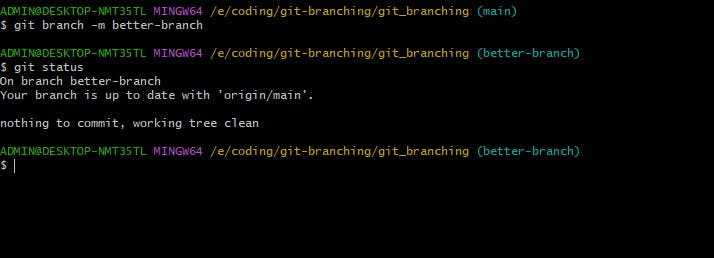
- In order to rename a branch other than the HEAD branch(the branch we switched from), type
git branch -m old_name new_nameAfter the -m argument, we type the name of our old branch name and after that the new one. - To rename a remote branch, we first delete our old branch that we want to rename
git push origin --delete old_name - Then we push the new branch with the new name
git push -u origin new_nameBut first, we would need to push the newly created branch to the remote repository.git push origin old_name
- To rename a remote branch, we first delete our old branch that we want to rename
- Suppose, we have a branch named other-branch, which is not present on the remote repository, and we want to create that new remote branch. Although, we cannot technically create, we can publish new branch to the remote repository.
git push -u origin other-branch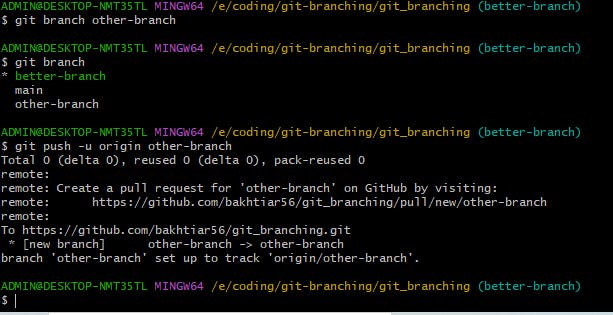
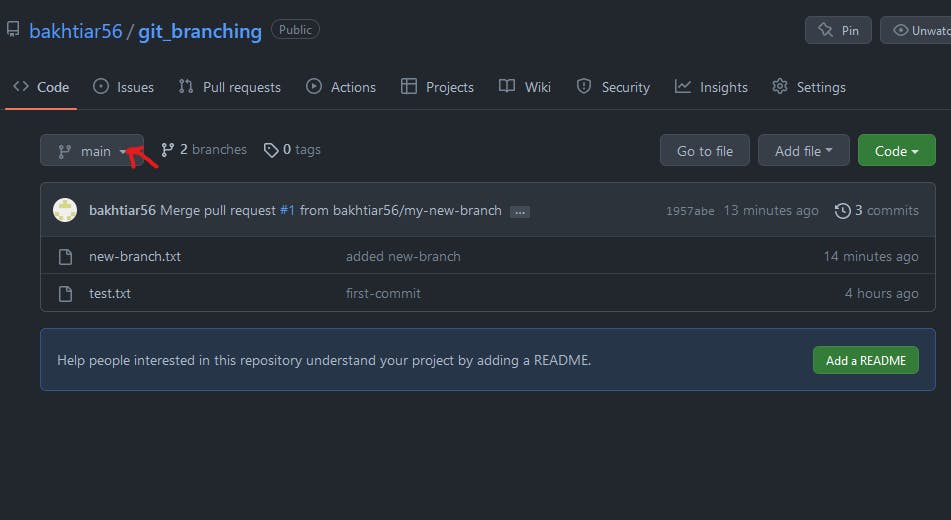
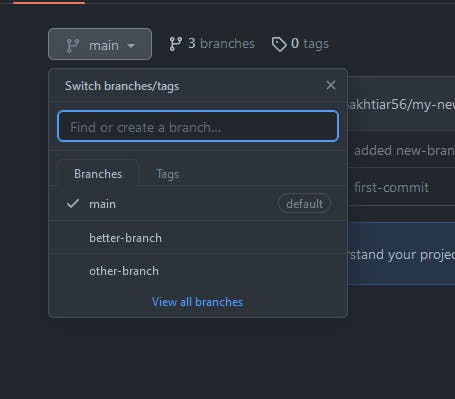
- To view the remote branches, we go to our Github repository and click on the drowdown menu named main on the left side.
Phew... that was a lot to process. So we will try practicing these commands and later learn about tracking and pushing branches.
See you in the next one!